Fruit tartes have been made for hundreds of years. The most current versions date back to the 1700’s in France when sugar became widely available. This led to the development of “pâté sucrée” for the crust “crème pâtissière” or pastry cream for the filling.
The popularity of tartes is due to (1) simplicity and (2) variety. They are easy to make and there are thousands of variations. There are three parts to tartes: the crust, the filling and the topping. The crust is baked; the filling is cooked separately, and the topping is added at the end. Generally, the finished tarte is served at room temperature. Some varieties are returned to the oven for baking.
At first, the recipe seems a little imposing and scary, but after making your first tarte, you will say “Wow, that was actually easy”.
Gear:
9-inch standard tarte pan
The Crust
Here is how to make a tarte crust or a pâté sucrée:
Ingredients:
- 1 cup of all-purpose flour
- 1/2 cup of powdered sugar
- 1/2 tsp. Kosher salt
- 6 Tbsp. unsalted butter
- 1 tsp. vanilla extract
- ¼ cup whole milk
- 1 egg yolk
- Lemon zest from one lemon
Procedure:
- Mix the flour, sugar and salt in a mixing bowl
- Cut the butter into pats and add to the dry ingredients. With your fingers, combine the butter with the dry ingredients. It should have an oatmeal structure at the end.
- Add the vanilla, milk, egg yolk and lemon zest. Mix with your hands until dough comes together.
- Knead briefly and wrap in plastic. Cool in refrigerator for at least one hour until firm.
- Set oven to 350 degrees.
- After the dough is cold and set, roll it out on a floured surface, rotating 90 degrees frequently, until large enough to cover bottom and sides of pan. You will have plenty of dough, so don’t roll it too thin.
- Roll the dough onto rolling pin and unroll onto pan. Press the dough gently against the side of the tarte pan, leaving no spaces. Roll the pin over the top edge to cut off any excess.
- With a table fork, punch holes in the bottom of the crust. The more holes the better.
- Bake for 15 minutes or until golden brown.
- If you let the crust cool in the tarte pan, it will continue to cook and become overdone. Find a small mixing bowl, turn it upside down and set the tarte pan on top. The ring should fall off. Slide the crust onto a wire rack to cool.
- Once cool, you can wrap the crust in plastic wrap and store in the fridge until you are ready to make your tarte.
This is the basic crust. There are many options such as decreasing regular flour by one-half and adding almond flour, crushed hazelnuts or whatever strikes your fancy. You can also “paint” the bottom with melted chocolate both to add flavor and prevent the dreaded “soggy bottom”.
The Filling
The usual filling is a standard pastry crème which is made as follows:
Ingredients:
- 2 cups whole milk
- 2 tsp. vanilla extract
- 4 egg yolks (save the egg whites to make meringue or macarons)
- 1/3 cup sugar
- ¼ cup cornstarch
- ¼ tsp. Kosher salt
- 2 tbsp. unsalted butter – cut into very thin pats
Procedure:
- Heat the milk and vanilla to near boiling in a medium saucepan.
- Whisk together the egg yolks, sugar, cornstarch and salt in a separate mixing bowl
- Add one cup of hot milk to the mixing bowl, ¼ cup at a time, stirring vigorously.
- Pour the contents of the mixing bowl back into the saucepan. Cook over medium heat, stirring frequently with a whisk until mixture begins to boil and starts to thicken and soft peaks begin to form – about 5 minutes.
- Remove from the heat and cover the top with the pats of butter which will melt and prevent skin from forming on the custard.
- Press plastic wrap onto the surface of the custard and cool completely in the fridge before filling the crust.
Again, the basic custard is just the starting point. You can add liqueurs of different types or nuts to the custard. In other words, you can do anything to change the flavor of the standard custard.
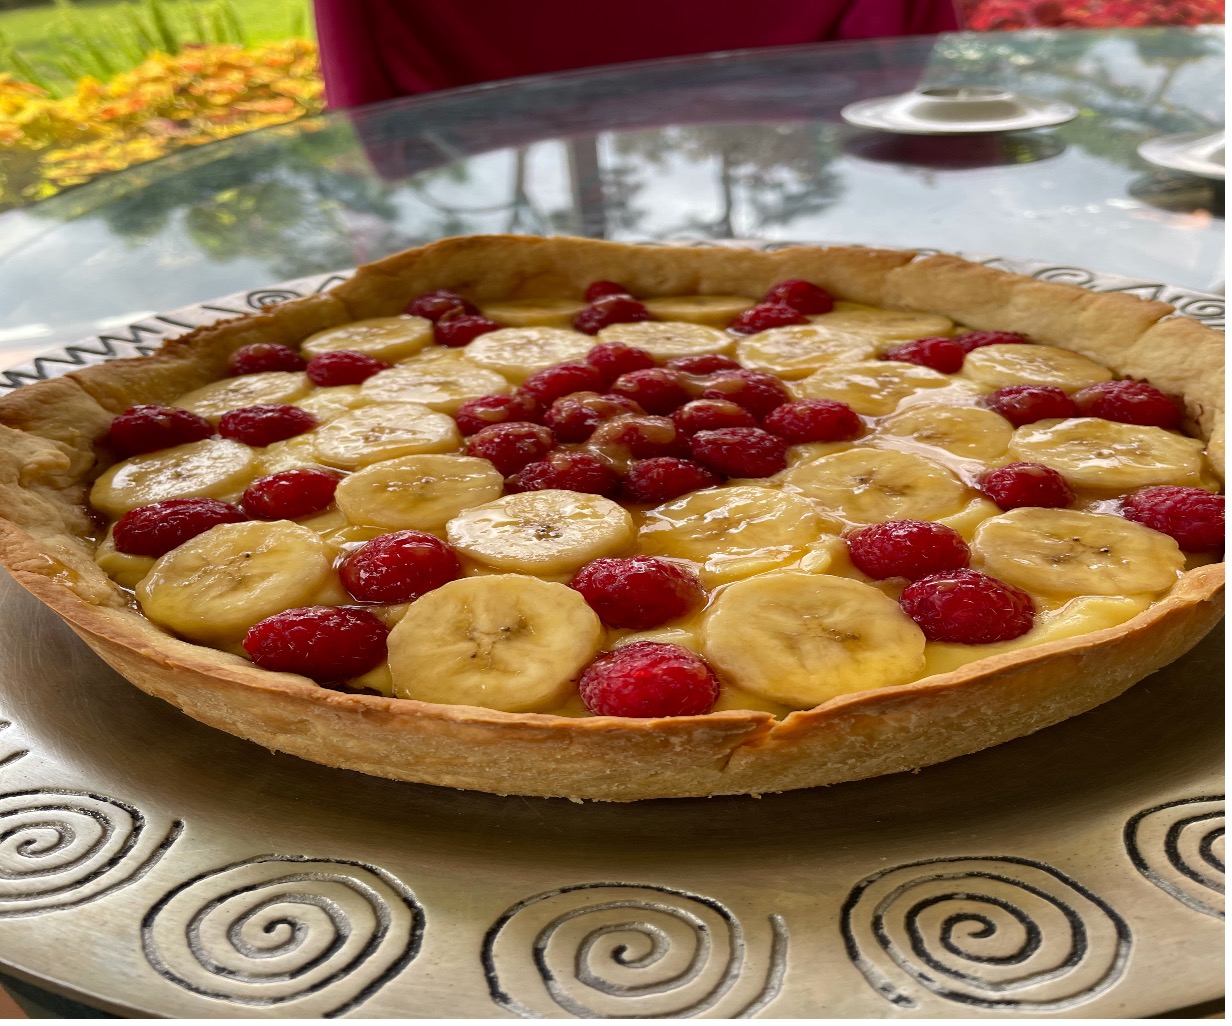
The Topping
The most common topping for tartes is fruit. Berries, kiwis, and bananas are very popular. There are no rules here, so do whatever turns you on. We like to do symmetrical designs with a variety of fruits; others like to cover the top with one type of fruit. One of the neophytes in our Baking Club came up with a raspberry stuffed with a blueberry. Bananas are surprisingly good. Anything goes.
Here is how to finish off a fruit tarte:
- Spoon the custard into the crust with a silicone spatula.
- Prep fruit as required, e.g. slice strawberries and kiwis.
- Decorate top as desired.
- Take a picture and serve.
Categories: Classic Desserts, Classic Recipes by Type

Have you tried adding Pomegranate juice to flavor the custard? And then sprinkle some Pomegranate seeds as a topping too!
Sounds like a good idea. We will try it.